A grill frying pan is a versatile kitchen tool that allows you to achieve grilled flavors and char marks indoors, regardless of weather or outdoor space. As experts at hljnt.com with over 15 years of experience, we confirm that these pans are ideal for apartment dwellers or anyone seeking year-round grilled meals. This guide will help you select, use, and maintain your grill frying pan to unlock its full potential for transforming your culinary creations.
What Exactly is a Grill Frying Pan and Why Do You Need One?
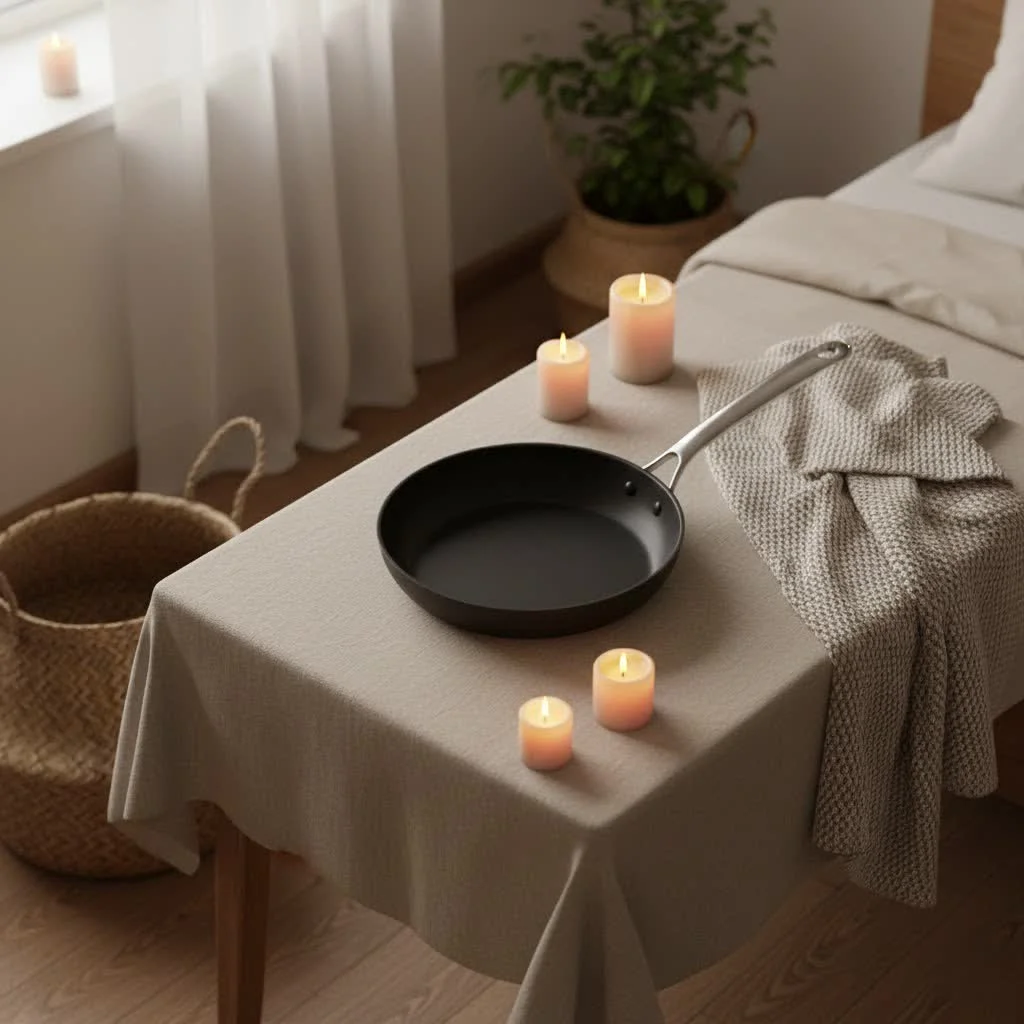
At its core, a grill frying pan is a type of skillet distinguished by its characteristic raised ridges on the cooking surface. Unlike a flat frying pan, these ridges are designed to mimic the grates of an outdoor grill, elevating food slightly above the pan’s base. This ingenious design allows excess fat and juices to drain away into the valleys between the ridges, while the direct contact points create those visually appealing and flavor-enhancing grill marks.
What makes a grill pan different from a regular frying pan? The key difference lies in its raised ridges, which mimic an outdoor grill by lifting food off its own juices and creating those coveted char marks, allowing for healthier cooking and a distinct texture. For apartment dwellers, those with limited outdoor space, or anyone who simply wants grilled flavors year-round, a grill frying pan offers unparalleled convenience and versatility.
The Science of Sizzle: Unpacking the Benefits of a Grill Frying Pan
A good grill frying pan isn’t just a kitchen gadget; it’s an investment in healthier, more flavorful, and visually stunning meals.
Achieve Iconic Grill Marks & Enhanced Flavor
Those distinct char lines aren’t just for show; they’re a hallmark of superior flavor. When food makes direct contact with the hot ridges of a grill frying pan, it undergoes the Maillard reaction – a complex chemical process responsible for the browning and savory notes we associate with grilled foods. This reaction develops delicious flavor compounds, giving your dishes a depth that a regular flat pan simply can’t achieve. “The beautiful crosshatch marks a grill pan creates aren’t merely aesthetic; they signify a burst of concentrated flavor that truly elevates a dish,” explains Chef Elara Vance, a seasoned culinary artist and pan-cooking enthusiast.
Healthier Cooking, Less Fat
One of the standout advantages of using a grill frying pan is its contribution to healthier eating. As your food cooks, the raised ridges allow rendered fats and oils to drip down into the grooves, keeping your ingredients from sitting and cooking in their own grease. This means less fat in your finished meal without sacrificing taste, making it an excellent choice for lean meats, poultry, and vegetables.
Unmatched Versatility for Every Kitchen
|
Our Picks for the Best Frying Pan in 2026
As an Amazon Associate I earn from qualifying purchases.
|
||
| Num | Product | Action |
|---|---|---|
| 1 | CAROTE Nonstick Frying Pan Skillet,Non Stick Granite Fry Pan Egg Pan Omelet Pans, Stone Cookware Chef\'s Pan, PFOA Free,Induction Compatible(Classic Granite, 8-Inch) |

|
| 2 | Tramontina Professional 10-Inch Non Stick Frying Pan, Heavy-Gauge Aluminum Skillet with Reinforced Nonstick Coating, Red Handle, Dishwasher and Oven Safe |
|
| 3 | Amazon Basics Ceramic Nonstick Pots and Pans Cookware Set, Dishwasher & Oven Safe, Even Heating, 10-Piece Set, Copper Color |
|
| 4 | Lodge 10.25 Inch Cast Iron Skillet – Pre-Seasoned Frying Pan with Teardrop Handle – Oven, Stovetop, Grill & Campfire Use – Made in USA – Durable, Non-Toxic, Even-Heating Cookware – Black |
|
| 5 | Amazon Basics Non Stick Kitchen Cookware 8-Piece Set, Non-Induction, Includes Pots and Pans, Black |
|
| 6 | Amazon Basics Non Stick Kitchen Cookware 15-Piece Set, Non-Induction, Includes Pots, Pans, and Utensils, Black |
|
| 7 | All-Clad D3 12\" Stainless Steel Frying pan W/Lid, 3-Ply Stainless Steel Pan, Induction, Oven Broiler Safe 600F Skillet, Professional Cookware, Silver |
|
| 8 | Ammeloo Tri-Ply Stainless Steel Frying Pan Set of 3, 8\", 9.5\", 11\", Non Stick Frying Pans and Skillets, Non Toxic Hybrid Pan, Induction Compatible Cooking Pans, Chef Pan, Black Interior |
|
| 9 | Yonida Non Stick Frying Pans, 12-inch with Lid, Hybrid Frying Pans Nonstick Upgrade,non stick Skillets Stainless Steel, Dishwasher & Oven-Safe, Induction Compatible Cooking Pan, PFOA Free Cookware |
|
| 10 | SENSARTE Nonstick Frying Pan Skillet, Swiss Granite Coating Omelette Pan, Healthy Stone Cookware Chef\'s Pan, PFOA Free (8/9.5/10/11/12.5 Inch) (9.5 Inch) |
|
A grill frying pan is surprisingly versatile, ready to tackle a wide array of ingredients. From juicy steaks, chicken breasts, and fish fillets to vibrant vegetables like bell peppers, zucchini, and asparagus, if you can grill it, you can likely cook it in a grill pan. Many grill pans are also compatible with various stovetop types, including gas, electric, and even induction cooktops, and some can even transition to the oven for finishing dishes. This adaptability makes the grill frying pan an indispensable tool for any home cook looking to expand their culinary repertoire and enjoy grilled textures anytime.
Choosing Your Perfect Grill Frying Pan: A Material Masterclass
Selecting the right material for your grill frying pan is crucial, as it impacts everything from heat distribution and durability to maintenance and cooking performance.
What is the best material for a grill frying pan? For superior heat retention, even cooking, and the best grill marks, seasoned cast iron or enameled cast iron are generally considered the top choices for a grill frying pan.
Cast Iron: The Unbeatable Classic
For many culinary enthusiasts, nothing beats the performance of a cast iron grill frying pan. Known for its exceptional heat retention and even heat distribution, cast iron excels at creating those coveted deep grill marks and a beautiful sear. With proper care, a good cast iron grill pan can last for generations, becoming a cherished heirloom. The main considerations are its weight and the need for regular seasoning to maintain its natural non-stick surface and prevent rust.
Enameled Cast Iron: Beauty Meets Function
Enameled cast iron grill frying pans offer many of the benefits of traditional cast iron, including excellent heat retention and even cooking, but with added convenience. The enamel coating eliminates the need for seasoning and simplifies cleanup. While often more aesthetically pleasing and easier to maintain, enameled cast iron typically can’t withstand the extreme high temperatures that bare cast iron can, requiring a bit more caution to protect the coating. However, for many home cooks, the ease of cleaning and maintenance outweighs this limitation.
Non-stick & Other Materials: When to Consider
While you’ll find grill pans made from aluminum, stainless steel, or with various non-stick coatings, these often fall short when it comes to true grilling performance. Aluminum and stainless steel heat up quickly but don’t retain heat as effectively as cast iron, potentially leading to less distinct grill marks and uneven cooking. Non-stick coatings, while great for easy release, are generally not designed for the high heat necessary to properly sear and char food in a grill pan; extreme temperatures can cause the coating to degrade over time. For the best “grill” effect, we usually steer away from these options.
Mastering Your Grill Frying Pan: Tips from a 15-Year Veteran
With the right grill frying pan in hand, it’s time to unleash its power. Here are my tried-and-true techniques for achieving indoor grilling perfection.
The Art of Preheating: Don’t Rush It
This is arguably the most critical step for success with any grill frying pan. You need a properly hot surface to achieve those beautiful grill marks and prevent sticking. Place your grill pan over medium-high heat and let it preheat for at least 5 to 7 minutes, and sometimes even longer for cast iron. You’ll know it’s ready when a few drops of water flicked onto the surface sizzle and evaporate instantly. Resist the urge to start cooking before your pan is adequately hot; patience here pays off.
Oiling Smart, Not Hard
When working with a grill frying pan, always oil your food, not the pan itself. Drizzling oil directly into the pan’s valleys can lead to it burning and smoking excessively, imparting an off-flavor to your food and making cleanup a nightmare. Instead, lightly brush or toss your ingredients with a high-smoke-point oil (like grapeseed, avocado, or canola oil) before placing them on the hot pan. A thin, even coating is all you need for perfect results.
Strategic Placement for Perfect Marks
For those iconic crosshatch grill marks, lay your food perpendicular to the ridges. Once placed, avoid moving the food immediately. Let it sear undisturbed for at least 1 to 2 minutes on each side to allow those contact points to properly brown and form the marks. Overcrowding the pan is another common mistake; it lowers the pan’s temperature and causes food to steam rather than sear. Cook in batches if necessary, ensuring each piece has enough space to breathe and make good contact with the ridges.
Covering for Success
While many grill pans don’t come with lids, covering your pan with foil or a suitable lid after placing food can be a major upgrade. This traps heat and moisture, helping thicker cuts cook through more quickly and creating a more “enclosed” grilling environment that enhances the char and overall flavor. Just to remove the cover for the last few minutes if you want a drier, crispier exterior.
Patience is a Virtue: Flipping and Finishing
Resist the urge to flip your food constantly. Let each side cook until it naturally releases from the pan before turning. The exact cooking time will vary based on the thickness of your food and your desired doneness, so use visual cues like browning and a meat thermometer for accuracy. As Chef Elara Vance often says, “Patience at the pan is a virtue that transforms good cooks into great ones. Trust the process, and let the heat do its work.” For thicker items, you might want to finish them in a preheated oven if your grill pan is oven-safe, ensuring they cook through without burning the exterior.
Keeping Your Grill Frying Pan Pristine: Cleaning & Care Secrets
Proper cleaning and maintenance are key to the longevity and performance of your grill frying pan, especially with those tricky ridges.
How do I clean a cast iron grill frying pan properly? To clean a cast iron grill frying pan, first let it cool slightly, then use hot water, a non-abrasive brush, and a scrub (like kosher salt or a specialized scraper) to dislodge food from the ridges, followed by thorough drying and re-seasoning if needed.
Cool Down, Then Clean
Always allow your grill frying pan to cool down after use, but don’t let it get completely cold. Cleaning while it’s still warm to the touch makes the process much easier, as residual heat helps loosen stuck-on bits. Never plunge a hot pan into cold water, as this can shock the material and potentially cause warping or cracking, especially with cast iron.
Tackling the Ridges: Tools and Techniques
The ridges are where food and grease love to hide. For effective cleaning, you’ll need the right tools:
- Non-abrasive brushes or sponges: These are ideal for scrubbing without damaging the pan’s surface or seasoning.
- Kosher salt or baking soda: A paste made from coarse kosher salt and a little hot water (or just salt and a paper towel) acts as an excellent natural abrasive scrub for stubborn food. Baking soda with water also works wonders on grease and grime.
- Specialized grill pan scrapers: Many brands offer plastic scrapers designed with contoured edges that fit perfectly into the pan’s ridges, making short work of stuck-on food.
- Hot water and (minimal) soap: For most grill pans, hot water and a non-abrasive scrub are sufficient. If you use soap on cast iron, use it sparingly and ensure you re-season afterward. Absolutely avoid metal scouring pads or harsh abrasive cleaners, as they can strip seasoning or damage enamel coatings.
The Importance of Drying & Seasoning
After cleaning, thoroughly dry your grill frying pan. For cast iron, this is non-negotiable to prevent rust. You can place it back on a low burner for a few minutes to ensure all moisture has evaporated. For cast iron grill pans, a quick “mini-seasoning” after each wash is beneficial: apply a very thin layer of high-smoke-point oil (like flaxseed or grapeseed) and wipe off any excess with a paper towel. Then, heat it on the stovetop over medium heat until it just begins to smoke, allowing the oil to polymerize and reinforce your seasoning. Let it cool completely before storing in a dry place. a well-seasoned cast iron pan will develop a beautiful, non-stick patina over time – don’t scrub it away!
Frequently Asked Questions
Q1: Can I get the same smoky flavor as an outdoor grill with a grill frying pan?
A: While a grill frying pan delivers fantastic char marks and enhanced flavors through the Maillard reaction, it won’t replicate the distinct smoky taste imparted by an outdoor charcoal or wood-fired grill. The absence of radiant heat and smoke from burning fuel means a different flavor profile, but still delicious!
Q2: How do I prevent food from sticking to my grill frying pan?
A: The keys to preventing sticking are proper preheating (get the pan really hot!), oiling the food (not the pan) with a high-smoke-point oil, and resisting the urge to move the food too soon. Let it sear and develop a crust before attempting to flip.
Q3: Is it okay to use soap on a cast iron grill frying pan?
A: Yes, it’s generally okay to use a small amount of mild dish soap on a cast iron grill frying pan. The old myth about avoiding soap is largely outdated. Just be sure to dry it thoroughly and perform a quick re-seasoning (oiling and heating) afterward to protect its surface.
Q4: How much oil should I use in a grill frying pan?
A: A very thin, even coat of oil brushed directly onto your food is usually sufficient. Over-oiling can lead to excessive smoke and burnt residue in the pan’s ridges, which can be difficult to clean and negatively affect flavor.
Q5: Can I use a grill frying pan in the oven?
A: Many grill frying pans, especially those made of cast iron or enameled cast iron, are oven-safe. However, always check the manufacturer’s instructions for your specific pan, as materials like certain handle types might limit oven use or temperature tolerance.
Embracing the grill frying pan means enjoying delicious, healthy grilled meals right in your kitchen, any time of year. With the insights shared here, you’re now equipped to choose the perfect pan, master the techniques for flawless results, and maintain it for years of culinary adventures. So go ahead, ignite that stovetop, and confidently improve your cooking with the power of the grill frying pan!
Frequently Asked Questions
Can a grill frying pan replicate the smoky flavor of an outdoor grill?
No, a grill frying pan will not replicate the distinct smoky taste from an outdoor charcoal or wood-fired grill. While it creates excellent char marks and enhanced flavors through the Maillard reaction, it lacks the radiant heat and smoke from burning fuel, resulting in a different, but still delicious, flavor profile.
What are the best methods to prevent food from sticking to a grill pan?
To prevent food from sticking, ensure proper preheating by getting the pan very hot for 5 to 7 minutes. Always oil the food directly with a high-smoke-point oil, rather than oiling the pan. Additionally, resist moving the food too soon; allow it to sear and develop a crust before attempting to flip it.
Is it acceptable to use dish soap when cleaning a cast iron grill pan?
Yes, it is generally acceptable to use a small amount of mild dish soap on a cast iron grill frying pan. The old myth about avoiding soap is largely outdated. After washing, always dry the pan thoroughly and perform a quick re-seasoning by oiling and heating it to protect its surface.
How much oil should be applied when cooking with a grill frying pan?
A very thin, even coat of high-smoke-point oil brushed directly onto your food is usually sufficient. Over-oiling can lead to excessive smoke and burnt residue accumulating in the pan's ridges, which is difficult to clean and can negatively affect the food's flavor.
Are grill frying pans safe to use inside a conventional oven?
Many grill frying pans, particularly those made of cast iron or enameled cast iron, are oven-safe. However, it is crucial to always check the manufacturer's instructions for your specific pan, as certain handle types or materials might limit its oven use or temperature tolerance.
Mastering Your Grill Frying Pan for Indoor Grilling
Achieve indoor grilling perfection with your grill frying pan by following these essential steps for preheating, oiling, placement, and cooking.
Place your grill pan over medium-high heat and allow it to preheat for at least 5 to 7 minutes, or longer for cast iron. The pan is ready when water droplets sizzle and evaporate instantly. Adequate preheating is crucial for achieving beautiful grill marks and preventing sticking.
Lightly brush or toss your ingredients with a high-smoke-point oil, such as grapeseed or avocado oil, before placing them on the hot pan. Avoid drizzling oil directly into the pan's valleys, as this can cause excessive burning and smoking, leading to off-flavors and difficult cleanup.
Lay your food perpendicular to the pan's ridges to create iconic crosshatch grill marks. Once placed, do not move the food immediately; let it sear undisturbed for 1 to 2 minutes per side to allow proper browning. Cook in batches to avoid overcrowding, which can lower the pan's temperature and steam food instead of searing it.
For thicker cuts of food, covering the pan with foil or a suitable lid can trap heat and moisture, helping them cook through more quickly. This creates an enclosed grilling environment that enhances char and flavor. Remove the cover for the last few minutes if you desire a crispier exterior.
Resist the urge to constantly flip your food; let each side cook until it naturally releases from the pan. Cooking times vary by thickness, so use visual cues and a meat thermometer for accuracy. Thicker items can be finished in a preheated oven if your grill pan is oven-safe, ensuring even cooking without burning the exterior.
Get our weekly buyer guide
Practical specs, not advice. Unsubscribe anytime.
This was super helpful for understanding the different types of grill pans. I’ve always just used a regular skillet, but the explanation about the raised ridges and how they drain fat really made sense. I’m definitely considering upgrading to one for healthier cooking, especially for things like burgers and sausages.
I’ve been wanting to try indoor grilling for ages but always thought I needed some fancy electric grill. This guide on grill frying pans was a game-changer! I picked up a cast iron one last week and made the best chicken breasts with perfect char marks. It’s so much easier to clean than I expected too.
I got a non-stick grill pan after reading about how they’re good for apartment living. While it definitely works for getting those grill lines, I’m finding it a bit tricky to get a really good sear without smoking up my small kitchen. Maybe I need to adjust my heat settings more, but it’s not quite as effortless as I hoped for steak.
As someone who lives in a condo with no outdoor space, a grill frying pan has been a lifesaver! I love that I can still get that grilled flavor year-round. I followed the tips for seasoning my new pan and it’s been fantastic for vegetables and fish. No more waiting for summer to enjoy grilled meals!